Quick-Start-Guide LiveV400
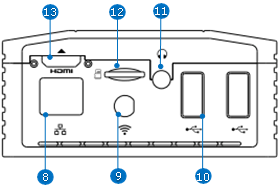
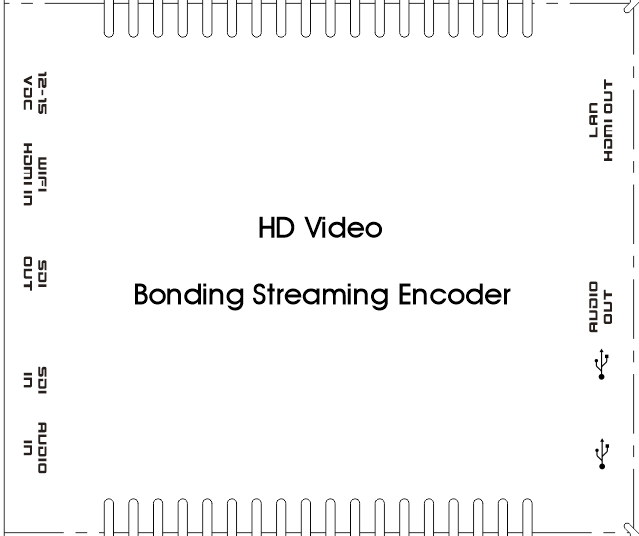
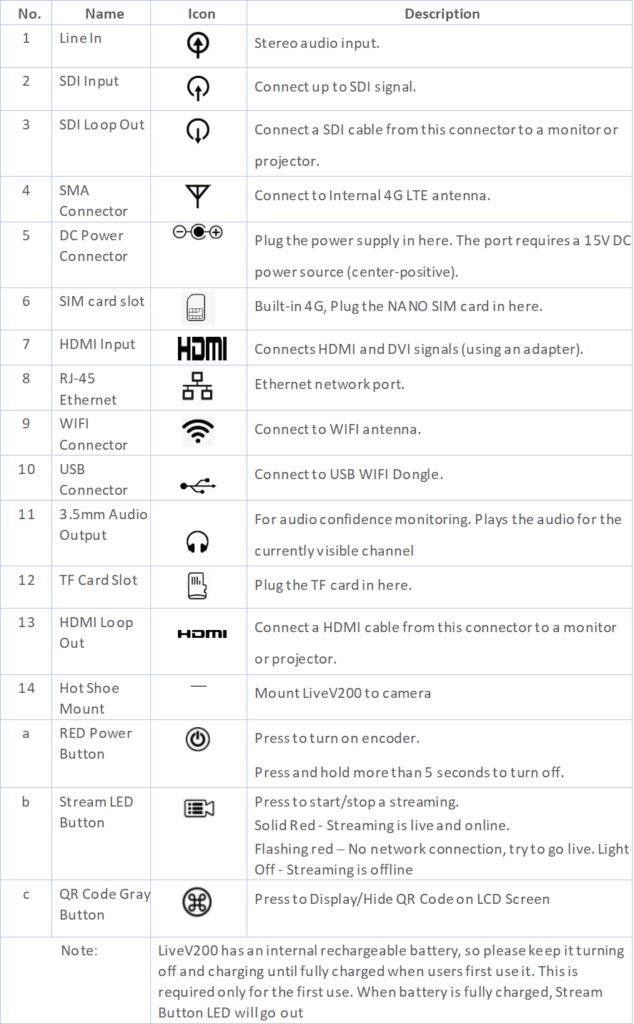
1. Connections
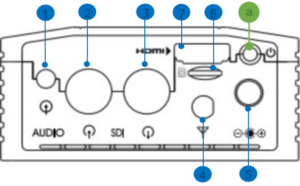
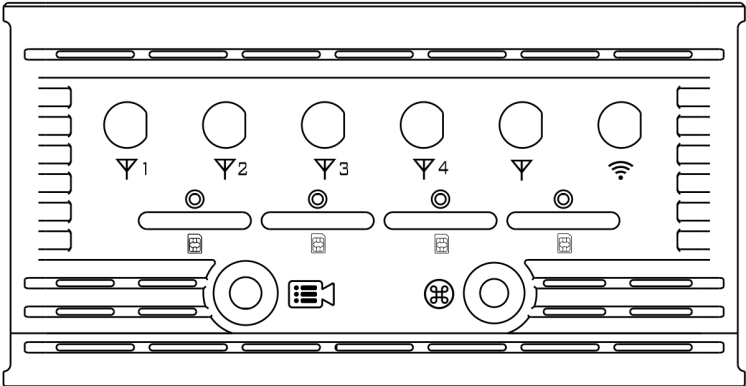
LiveV200 TOP
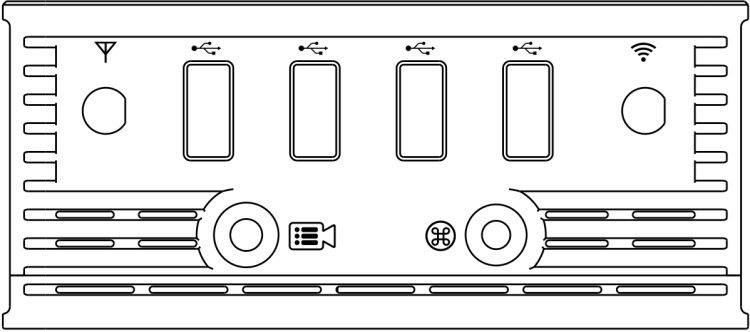
LiveV330/350 TOP
Live310 TOP
Live210 TOP
2. Screen Display
If LAN, WIFI, 4G network are connected, the screen will display all of the network information.
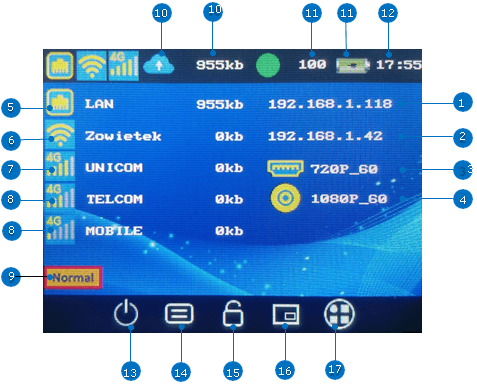
| No. | Description |
| 1 | The IP address of LAN network |
| 2 | The IP address of wireless network |
| 3 | HDMI signal input,
Display Resolution and Frame Rate of HDMI inputs |
| 4 | SDI signal input
Display No Signal when the no SDI input or SDI connection fail |
| 5 | Display LAN when the LAN connection is successful
Display uplink speed of LAN when the LiveV200 using LAN as streaming network |
| 6 | Display the WIFI SSID when the WIFI connection is successful
Display 0 kb when the WIFI is not involved in streaming |
| 7 | Display the Operator when the Built-in 4G connection is successful
Display 0 kb when the Built-in 4G is not involved in streaming |
| 8 | Display the Operator when the External 4G connection is successful
Display 0 kb when the External 4G is not involved in streaming |
| 9 | Streaming Mode: Normal (Single) or Bonding |
| 10 | Streaming Icon and Video streaming bit rate
The Streaming Icon disappears and display 0 kb when the streaming is offline |
| 11 | Battery Level and Battery percentage |
| 12 | Time |
| 13 | Power Off |
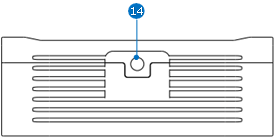
| 14 | Hide / Display desktop
Hide / Display text and icons on the LCD screen |
| 15 | Lock / Unlock screen |
| 16 | Video Collage
Customize layout, SDI and HDMI dual-channel seamless handover, Picture in picture |
| 17 | Menu Setting |
3. Quick Start Guide
Please follow the following steps for quick connection guidance of the encoder.
Step 1. Make the Power Adapter plugged in.
Step 2. Press the RED Power button on the left of the encoder to turn on the system.
Step 3. Turn on your camera or video source and connect the output to the corresponding connection of the encoder.
Step 4. Connect encoder to Network.
Encoder allows you to connect in multiple ways. Find brief descriptions of these modes below.
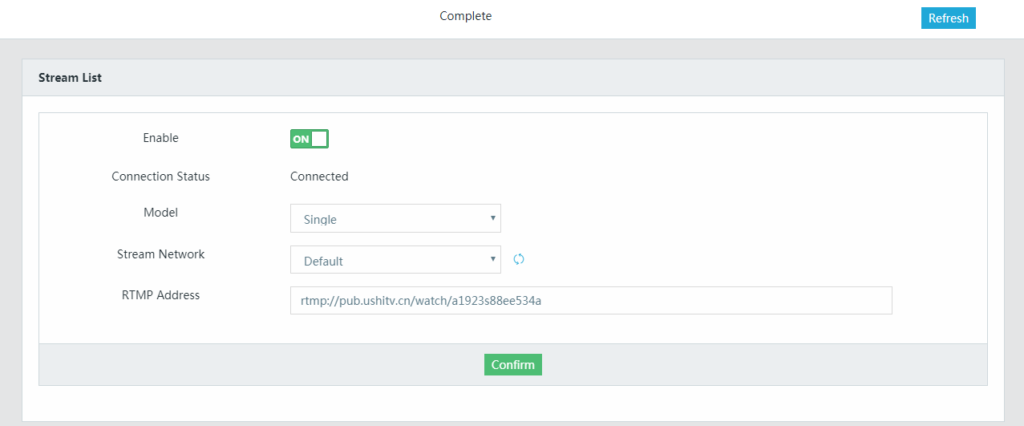
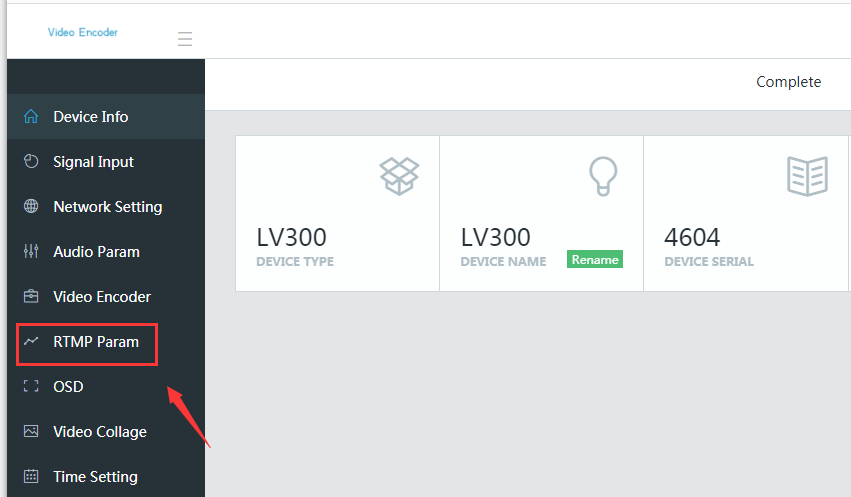
Step 5. After clicking the RTMP Param option on the left column of the web control UI, please fill in RTMP Address and click the Confirm button to apply the setting.

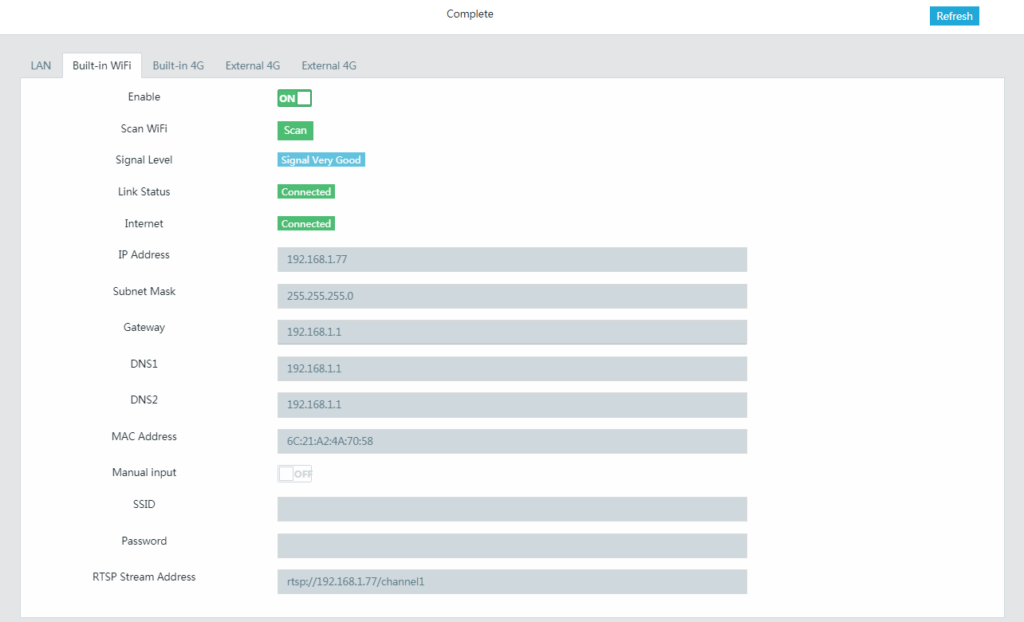
WIFI mode
There are four ways to connect to WIFI. Make sure that the WIFI Antenna is connected to the encoder, the device will connect to the WIFI automatically.
1. On LCD, please switch the WIFI button Open, then the user can press the Scan button, find the WIFI name and connect it.
2. Or press the Other button, then input the WIFI SSID and Password to connect a network, and don’t forget to click √ in the top right corner to save and apply it.

3. On the Web, click “Network”==>” Built-in WIFI”, after clicking the “scan” button, find the WIFI name and connect it.
4. After clicking the “Manual Input” button, please enter WIFI “SSID” and “Password” to connect a network.
If connect success, the information about the WIFI will be updated after clicking “refresh” button.
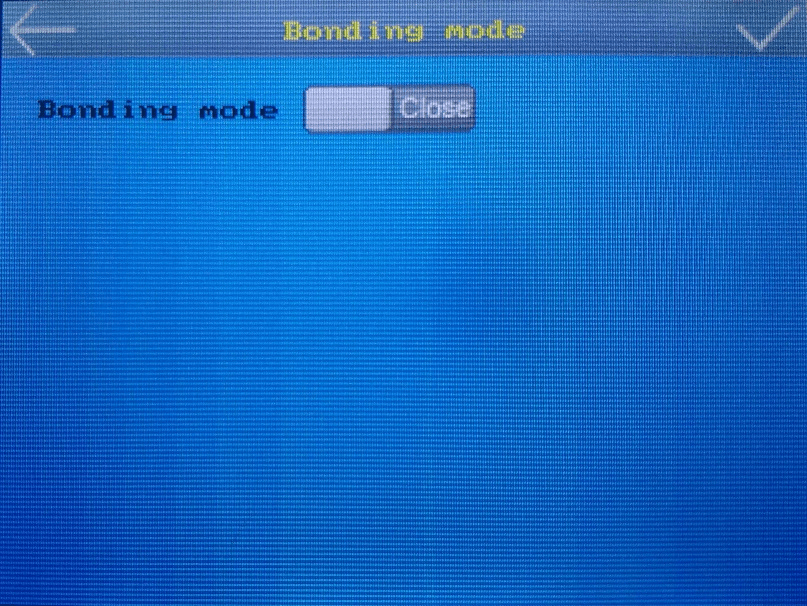
Bonding mode
On LCD, after clicking “Live”, you can turn on/off network bonding mode.
2. Another way, after clicking the “RTMP Param” option on the left column of the web control UI, the “Model” is selected as “Bonding”, the device will bond multiply connected networks as stream networks. Furthermore, the encoder supports up to 9 RTMP Address streaming simultaneously in this model.
Last, please fill in “RTMP Address” and click the “Confirm” button to apply the setting.
LAN mode
Connect the RJ-45 Ethernet cable from the LAN port to the router. The IP address() of the encoder will show on the LCD once connected to LAN or WIFI, users can enter the IP address into the address bar of the web browser on a PC or phone, and then the encoder Web Control User Interface will be shown as follows. In this example, the IP address is “192.168.1.118”.
RTMP Address
Step1. Please log in to your video streaming provider account.
Step2. Find RTMP URL or server URL in the ingestion area
Step3. Find the stream key in the same section
Step4. Copy, paste, and combine RTMP URL and stream key to the RTMP Address setting section of the encoder.
NOTE: Don’t forget click the confirm button to apply and save the setting.
Built-in 4G
Plug SIM card and connect the antenna to the encoder, this page provides users to choose whether to enable a built-in 4G network. The default 4G option is selected to be enabled.
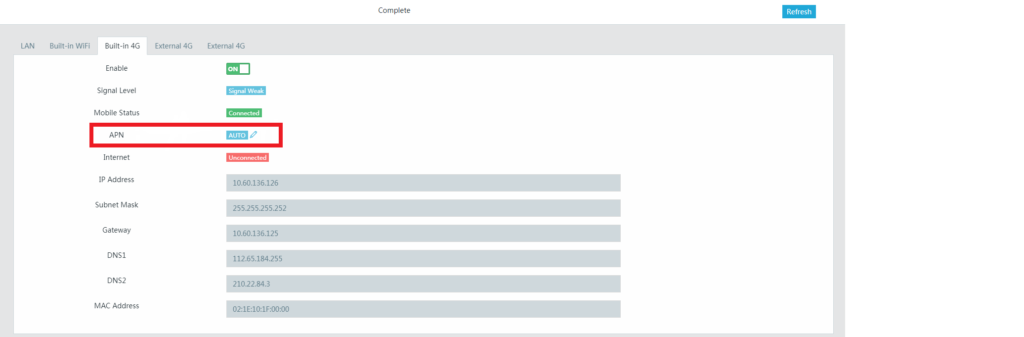
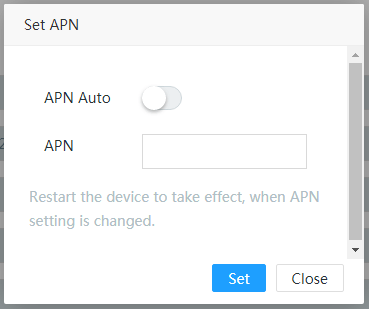
APN setting: After clicking the pen icon in the red mark box on the above picture, turn off APN Auto and fill in APN. Please ask your network operator or search online to find the APN of your 4G LTE network. When the APN setting is changed, don’t forget to restart the device to take effect.
External 4G
Plug the USB 4G Dongle into the encoder, the device will connect to the 4G net automatically. E8372H and MF833V 4G LTE dongles recommend.
NOTE:
SIM doesn’t support hot plugging, so turn off the unit before plugging.
When the WIFI connection setting is complete, don’t need to be set up again unless users want to connect to another WIFI.
4. Mobile-Phone Backend Setting
If you are not carrying or are inconvenient for using your computer, you can also choose to configure your encoder by using your phone’s backend settings. Please press the “QR Code” button on the top of the device to show the QR code at first, in another way, you also can find QR Code in the “Menu/Setting—QR Code”.
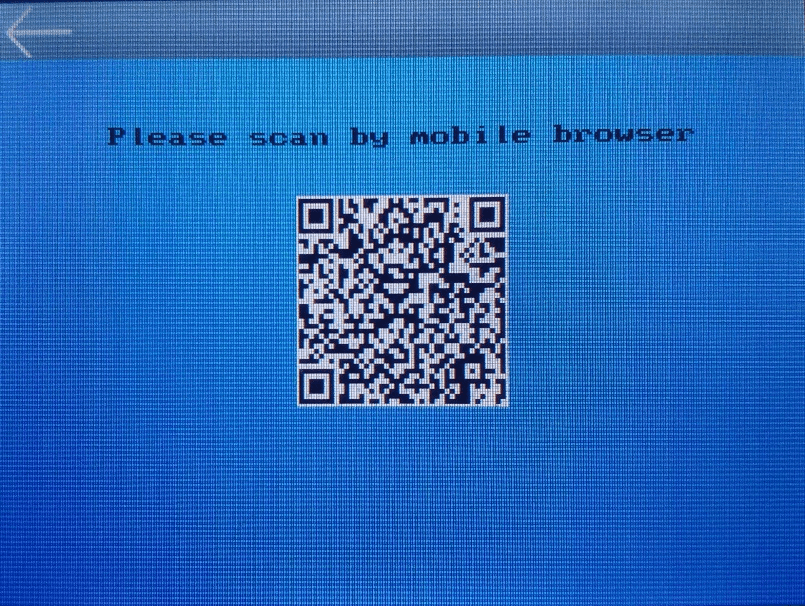
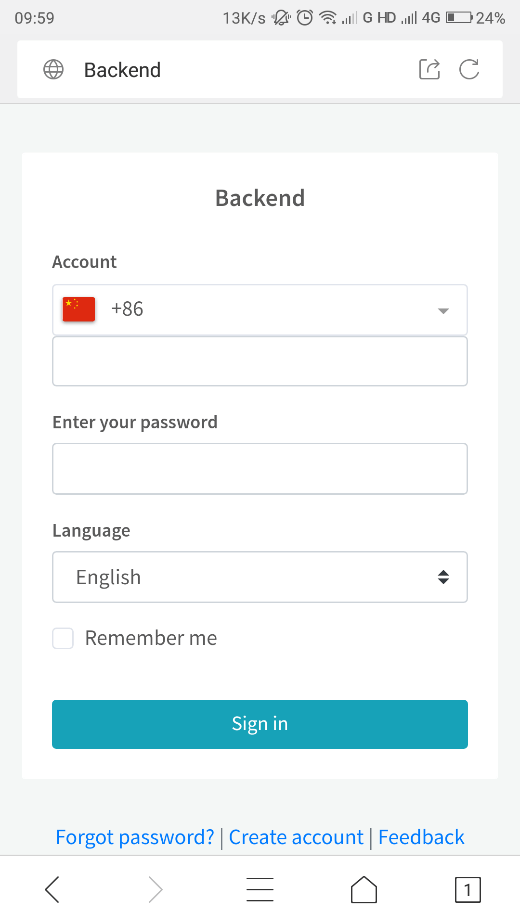
LiveV210’s QR code is at the back of the encoder. Please scan the QR code with your mobile phone and enter the user interface as shown below. If you don’t have an account yet, please click “Create account” at the bottom of the picture to create your account.
After logging in to your account and entering the interface as shown below, at first, please click on “active now” to bind the device to your account. Next time you can find your device in the list of personal devices.
Once you registered your account, you can also log in to your account at xx.livevbond.com on your PC to set the encoder. xx could be in, the EU, US, AU, CN, etc. depending on your encoder country or area.
NOTE:
Make sure to connect the aRJ45 network cable to the LAN port of the encoder.
Make sure the encoder is connected to the Internet before going ahead the first time.
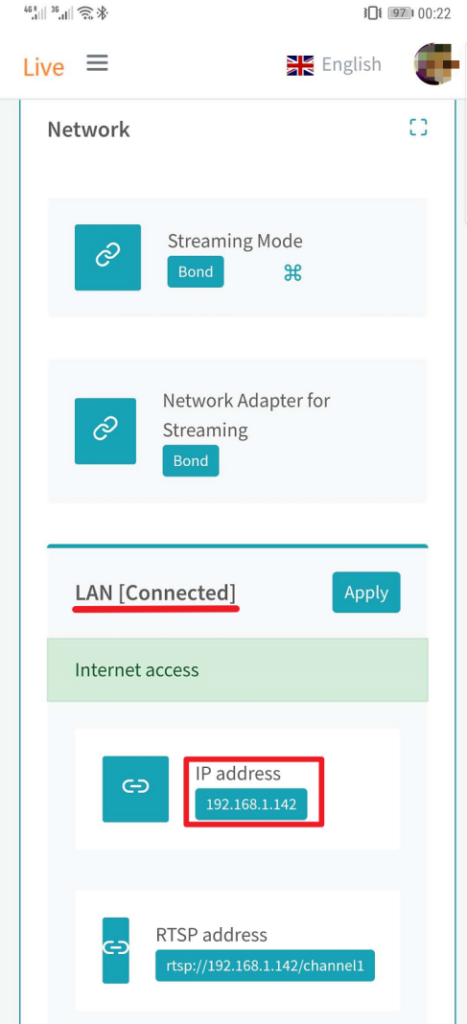
Find the LAN IP address for LiveV210
THE LAN IP address of LiveV210 can be found here in the red box, then you can visit this IP in the browser for advanced feature settings once having it. If LAN [Connected] does not show on this screen, that means the encoder does not connect to LAN or the LAN is not online. Please check the connection and Internet.
If you want to know more, you can download the user manual at this link:
https://www.zowietek.com/uploads/PortableBondedEncoder/UserManual3.1.pdf
